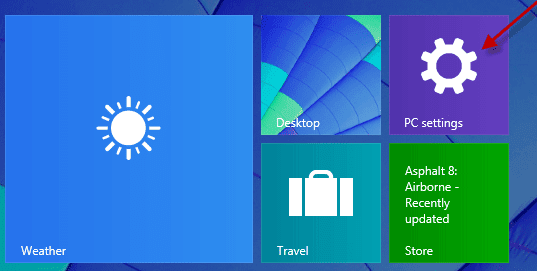
The new Windows 8.1 update lets you pin “PC Settings” option to your Start Screen, making it a lot easier to access various settings of your PC just by clicking or taping the “PC Settings” tile. The below simple guide lets you know how to pin the “PC Settings” option to Windows 8.1 Start Screen.
Previously, “Change PC Settings” option was only accessible via Charms bar or by clicking the Win + I shortcut keys. The new Windows 8.1 Update 1 lets you add PC Settings tile on your Start Screen.

Previously, “Change PC Settings” option was only accessible via Charms bar or by clicking the Win + I shortcut keys. The new Windows 8.1 Update 1 lets you add PC Settings tile on your Start Screen.

How to add PC Settings tile on your Windows 8.1 Start Screen?
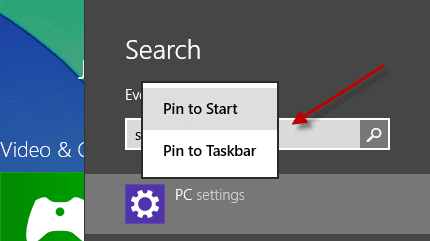
From your Start Screen, start typing “Settings”. You will see “Setting” tile appears. Just right the Setting tile that appears and selects Pin to Start.

Also, you can pin the Settings tile to Taskbar, so you can access PC Settings right from your desktop.
There is no need to say the functions of PC Settings option. It is the key component of Windows 8 and you can change several settings like adding and removing devices, Privacy, Network, OneDrive, personalizing the lock screen, changing the date and time, adding user accounts, Control Panel and more. (via)
Comments
Post a Comment
Please leave your valuable comment below